Common Mistakes Beginners Make While Learning Unity
Fast forward your unity journey by following these tips

prev swe @hometap & honors CS + Econ @northeastern , worked part time @hfaresearch | built @resmeai
Photo by Pawel Kadysz on Unsplash
I am a beginner in unity myself, but as they say, only a beginner can understand a beginner’s pain, so I wrote this blog post.
I learned unity using an online course, and although I was following the instructions, there are certain pitfalls that you just can’t avoid. Moreover, if you are trying to be creative and do extra than what they teach in the course, you will surely find yourself in a confused state for hours.
It happened to me! For some reason, all the levels in my game got deleted, and I had to create everything again. I could not understand what was going on with lighting, so everything was pitch black in my first game. I was trying to make a scoreboard for the game and text just won’t appear.
If you have already got your hand dirty, I am sure you know what I am talking about. But if you are new to this, this post will be a lifesaver. It’s difficult to find solutions/reasons for these problems. After surfing on google for hours, here are the solutions to these common problems.
Prefabs
Unity’s Prefab system allows you to create, configure, and store a GameObject complete with all its components, property values, and child GameObjects as a reusable Asset. The Prefab Asset acts as a template from which you can create new Prefab instances in the Scene.
Prefabs really are a lifesaver if you are working with a lot of similar objects and different levels. However, half-knowledge can destroy your project. That’s what happened to me when I accidentally deleted all the levels.
To create a prefab, simply drag any gameobject to the assets folder and the prefab will be created. You can now use this prefab to create the same game object how many times you want. The new game object will receive all their information about color, material, size, etc from the prefab, only the position and rotation will be different for each gameobject.
As the information is being retrieved from prefab, if you make any changes to that file, all the gameobjects deriving from it will be affected. You can make changes to game objects created using prefab, but make sure not to apply them to prefab, otherwise, all the other game objects (with the same properties as prefab) will be affected.
Ex- Let’s say we have 3 cubes: Cube A, Cube B, Cube C, all created using the same prefab. They can have a unique position and rotation values, but the scale and everything else are the same. Suppose, I change the size of Cube A from 1 to 2, nothing will happen to other cubes. But if I click on apply changes to the prefab, all the cubes will change.
So now we have all three cubes with size 2 and our prefab also has size 2.
Let’s change Cube C’s Z-axis side to 3, Cube B’s Z-axis side to 5, and leave Cube A and prefab to 2. Now if I click on Cube C and apply the prefab, Cube A’s Z-axis side will change to 3 as well, because it was the cube with a similar attribute as the prefab. Cube B won’t change at all!
To understand it better, I recommend you to get your hands dirty. Prefabs Unity's The fundamental object in Unity scenes, which can represent characters, props, scenery, cameras, waypoints, and…docs.unity3d.com
Lighting
 on [Unsplash](https://unsplash.com?utm_source=medium&utm_medium=referral)](https://cdn-images-1.medium.com/max/12000/0*2233amGzVXDP6vVK)
Lighting is one of the most important things in a game. No matter how your scene looks, but without lighting, it is just like food without salt. There are many kinds of lights in unity — point lights, spotlight, directional light, environment lighting, etc. There are various ways to render lights as well, and if you mess it up your scene may just look pitch black.
There are a lot of things we can discuss lighting, but it is not possible to look at everything in a single article.
To improve the lighting of your scene, you can adjust the environment lighting by using different skyboxes, different intensities, and reflections.
Turn off environment lighting and add spotlights or point lights as per your requirements. Now turn back on environment lighting to get the final view of the scene.
Turn off Auto Generate lighting and generate lighting manually once you have set all the illumination objects. This will create a Lighting Data Asset in the project. It contains Scene’s GI data, and other data needed to light the scene.
As Auto-generate lighting stores the lighting data in the memory rather than storing it in a file, unity loses the GI data for scenes that are unloaded in the play mode.
Use the link below to learn more. Lighting Best Practices - Unity Learn Optimizing Scene lighting is not an exact science - your process usually depends on your artistic direction. For this…learn.unity.com
Canvas
All the UI elements must be placed in the canvas gameobject as its children.
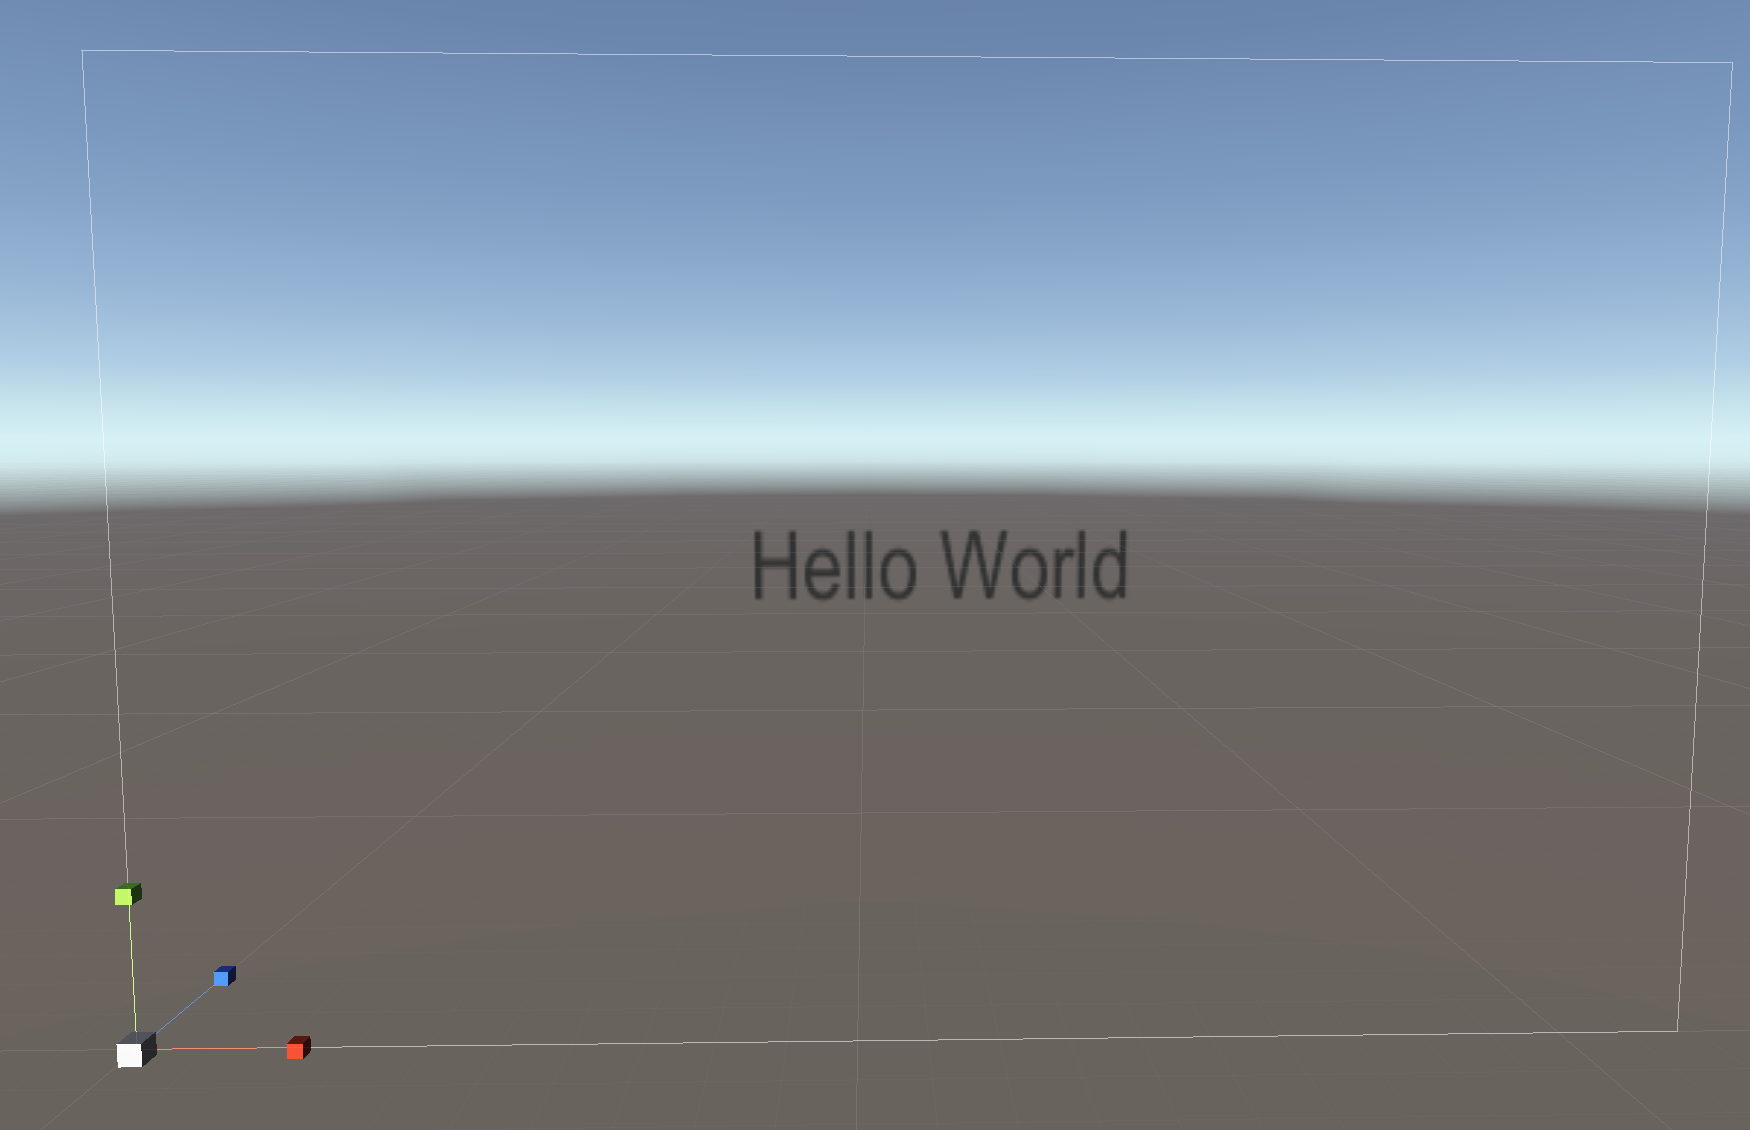
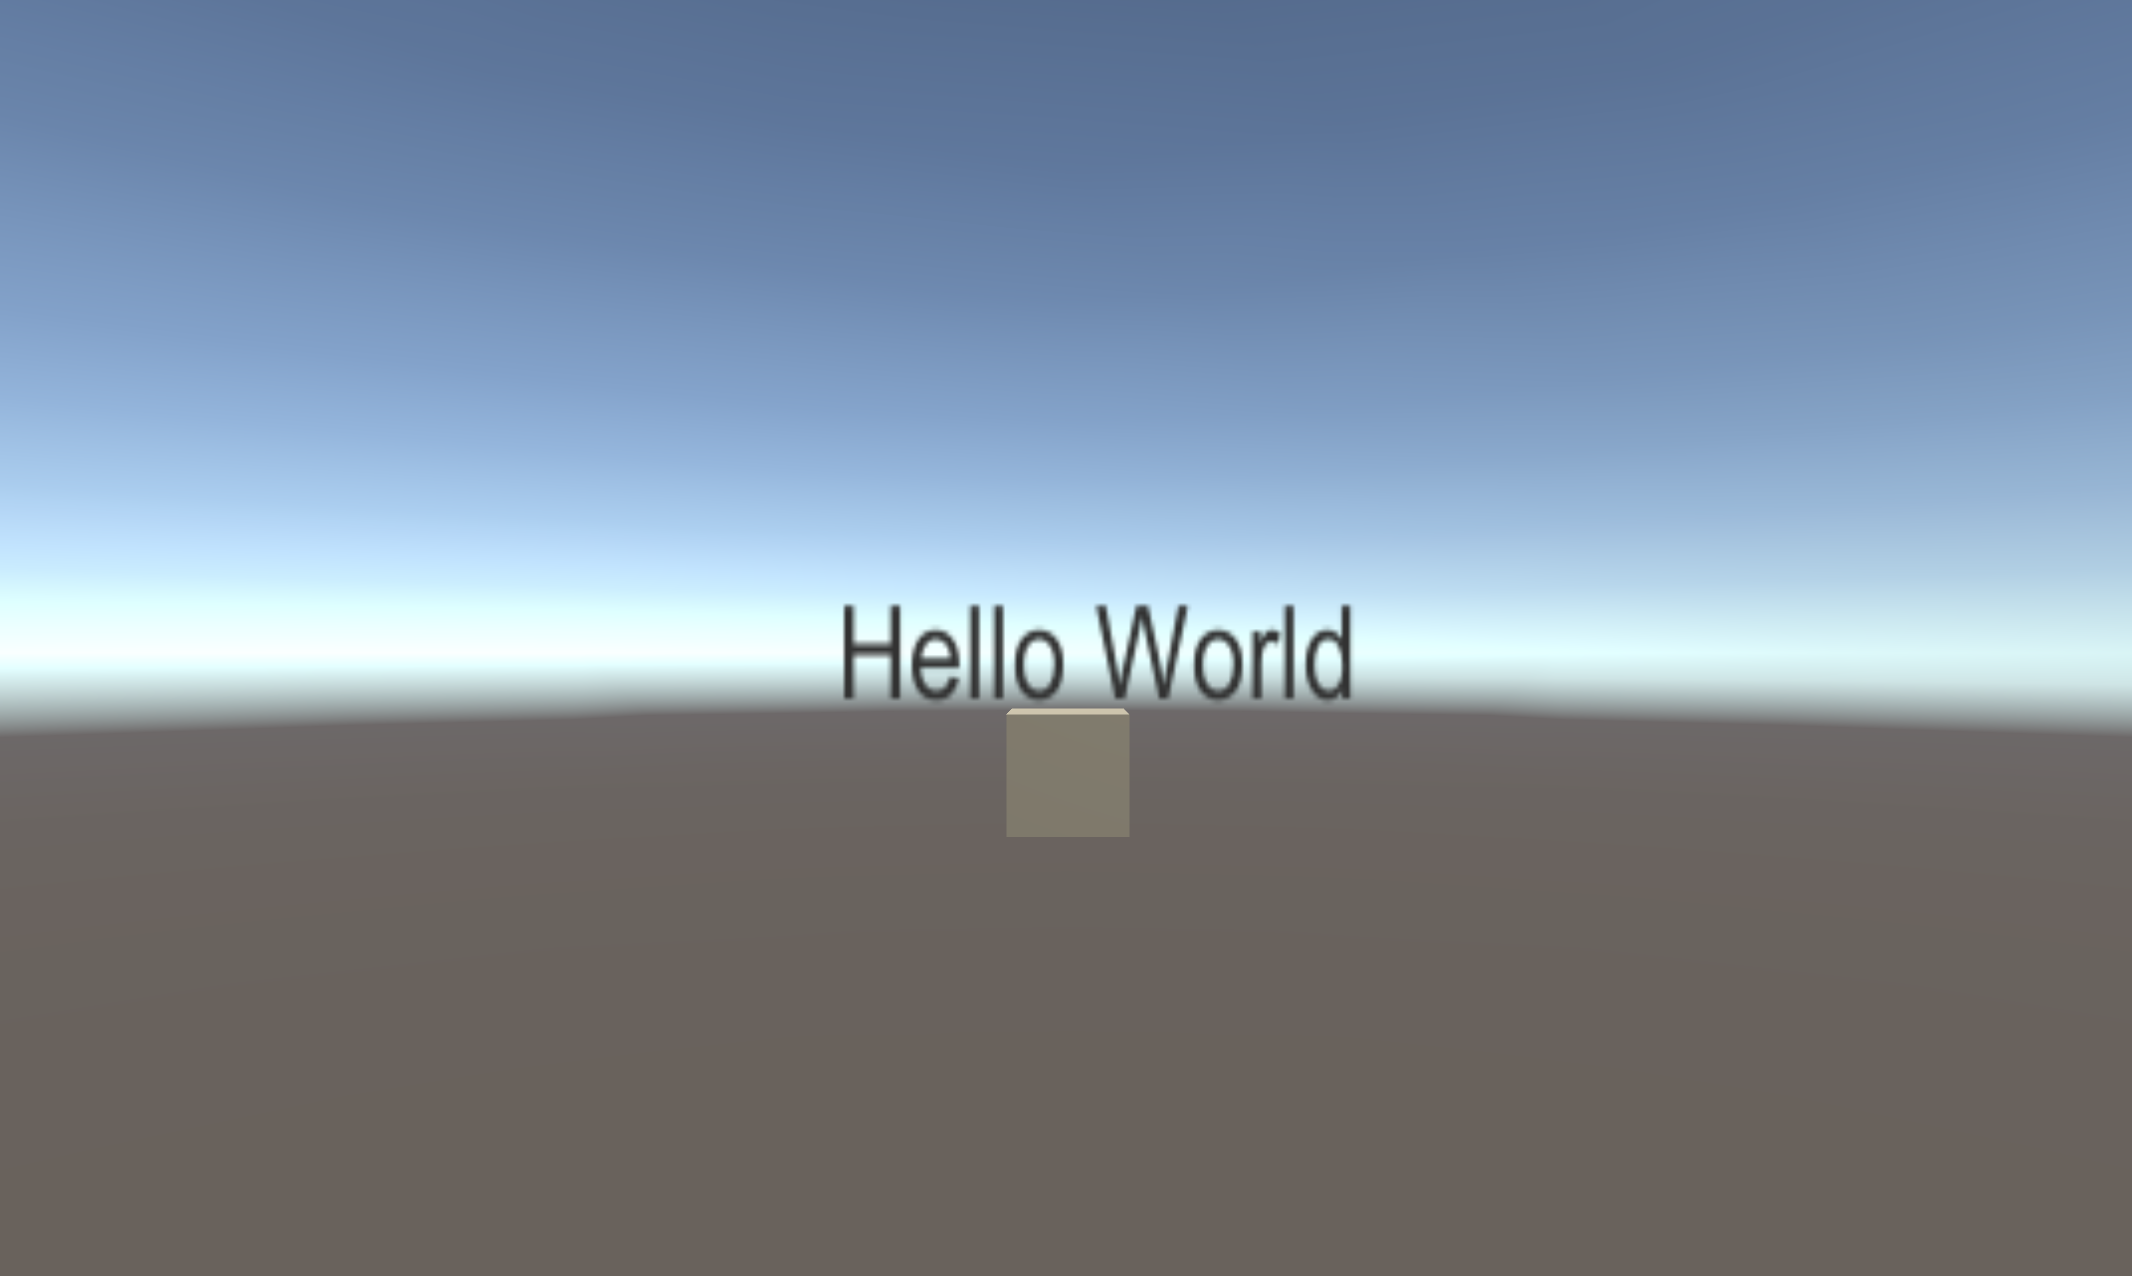 Canvas in scene mode, with text in the middle. Treat canvas as full screen. The main game object is on the bottom left corner (left) Result in game mode, the text is displayed as expected — in the middle of the screen (right)
When you create a text field, a canvas game object is automatically created. As shown in the image, this canvas looks huge compared to the game. One might think that they need to reduce the size of the canvas to fit it according to the game, but it is not the case.
Treat this canvas as the same size as your screen and place UI elements, as shown in the image. The result in the game scene will be as you expect. This is true for the default — screen space overlay render mode.
There are 3 render modes available in canvas: screen space-overlay, screen space-camera, and world space. The way UI elements will change is based on what render mode you choose.
In the screen space-overlay mode, if the screen is resized, or the resolution is changed, the canvas will automatically change to match it.
In screen space-camera mode, the canvas is placed at a given distance in front of the camera. In this mode, the camera setting affects the appearance of the UI.
In world space mode, the canvas will behave as any other game object. You can use this mode when UI must be placed behind or in front of other game objects. Canvas The Canvas is the area that all UI elements should be inside. The Canvas is a Game Object with a Canvas component on…docs.unity3d.com
Don’t copy the tutorial
In the beginning, in fear of not messing up anything, it feels easy and the right thing to exactly copy the tutorial. But don’t do it.
With time, the UI of unity (or any other program/language) changes. If you cannot make a project without relying upon tutorials, at some point you will get stuck. It’s better not to copy everything, let your imagination run wild, and use google whenever you are stuck.